
In my previous post, I have explained how to set up for .Net Core 2.0 which you can find here.
But in that post, it mainly focuses on how to do the setup if you already have .Net Core. So in this post, I will explain how to install .Net core 2.0(Without having Core 1.0) on your machine.
First of all, you need to install .Net Core 2.0 sdk from here.
Once you double click on the exe, it will start the process as below:

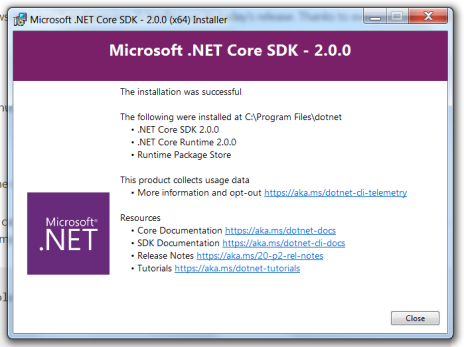
Once the process is done, it will show below window:
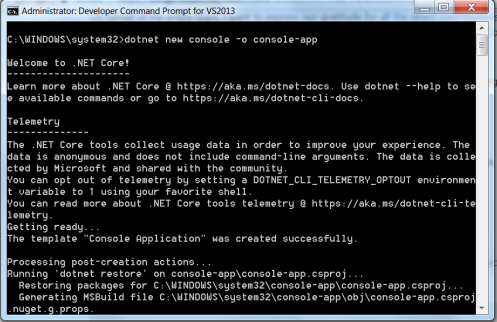
Once this is done, Open Visual Studio command prompt as below and run the command:
dotnet new console -o console-app
It shows that .Net Core 2.0 has been installed on your machine. For more information, you can go through the documents by clicking on the links shown in the console.
Now we will run a console application from the command prompt.
One sample application is already provided which resides on below path(It may change):
C:\Windows\System32\console-app
Now run the command:
dotnet run
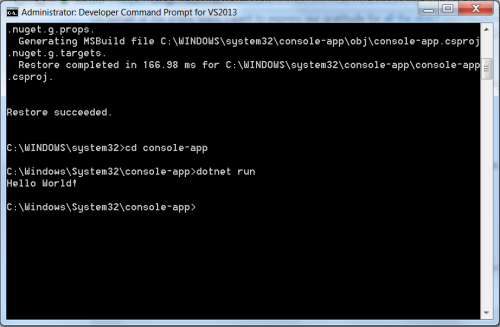
Which will return “Hello World”, it shows your installation is successful.
You can even run below command to verify the version:
dotnet –version
It should return 2.0
You can open this sample project on Visual Studio 2017.
To Create new Core 2.0 project, you need to select the version in the drop down as shown below:

